Thursday, May 16, 2013

Colony Barracks test model complete


This is one I designed more than a year ago, before I took my long hiatus from modeling. The Colony Barracks is inspired by the Hadley's Hope colony from the movie Aliens (maybe you've heard of it).

The command tower is optional, so you'll get at least a couple of distinct models out of the one kit. Lots of optional gribblies too (wall/windows, antenna modules, power generators).


Monday, May 6, 2013

Low Wrecked Walls design complete

I've finished this kit, and will release it on Thursday or Friday to try to hit the weekend shopping traffic.


Sunday, May 5, 2013

Low Wrecked Walls work begins


I have a couple of projects in the works right now, and one of them is a set of low 3D wrecked walls. I'm pretty sure I'll be done with this set within the week, and if it proves to be popular then I'll start working on taller wall sets in the same 3D style, with cutouts for windows and doors (both wrecked and not-wrecked).

The Low Wrecked Walls set includes (4) 3" wall sections and (8) 6" wall sections. Texture options include stone (2 colors), bricks (5 colors), stucco and broken stucco, concrete (2 colors), optional bullet holes, burns, moss and graffiti, about 15 layers in all.


Thursday, April 11, 2013

Country Brewery walls textures preview


Here are some of the wall options (not quite finished) for the Country Brewery.


Wednesday, April 10, 2013

Country Brewery roof textures preview


A peek at the roof texture options for the Country Brewery. I might adjust the colors before finalizing the PDFs, but this gives you the idea of where things are headed.


Friday, April 5, 2013

Country Brewery textures in progress

Here's how things are coming along. Looks weird without windows and doors, hey?


Tuesday, April 2, 2013

Country Brewery test model complete

I've finished my white-paper test model of the Country Brewery.

Here's the cleaned-up, polished, colorized version that I'll use when writing up the assembly instructions. I'll be able to highlight specific parts using this graphic.


And an actual photo of the test model, with a couple of 28mm-30mm scale miniatures to give you an idea of the size. You'll notice that the footprint (the ground piece) is a little different on the upper image. I decided to move the whole model back 1" from the front gate, giving a little room for a walkway in front of the fence. No big deal, but that's why I use cleaned-up graphics rather than photos: it lets me make even more revisions to the model kit.


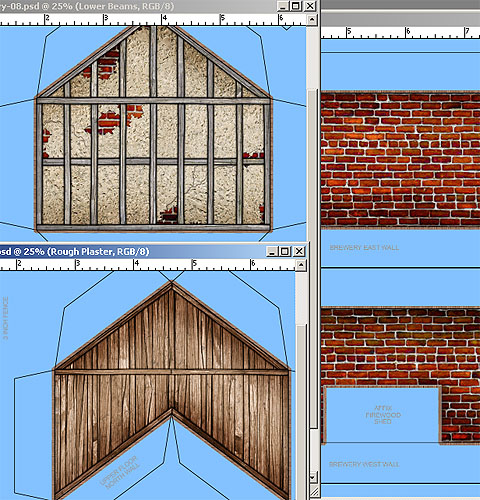
With the test model finished, I can start working on the textures. I've been gathering a lot of new texture sources for grounds, walls, roofs, wood piles and other stuff. One of my goals this year is to create a bunch of new textures, and while I haven't exactly retired all of my old stuff, I'm trying to avoid using textures that have been used over and over.