http://www.wargamevault.com/

Thursday, September 26, 2013
One-Day One Dollar Sale!
HAPPENING NOW! The One-Day One Dollar sale! All of my stuff is just $1.00 each right now at Wargame Vault, RPGNow and DriveThruRPG. This sale will be over before you know it, so grab what you can! (And the Budget Bundle is specially marked at $20.00.)
http://www.wargamevault.com/
http://www.wargamevault.com/
Saturday, August 31, 2013

Wednesday, August 28, 2013


Tuesday, August 27, 2013
SketchUp sketchbook and pavers tile work in progress
Concept models for the Guild Hall Version 2 and Jumble House Version 2, done in SketchUp:


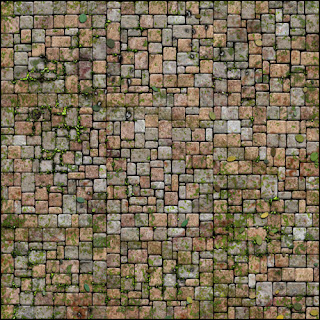
Adding weathering layers to Pavers Tile Kit #3:

Monday, August 19, 2013

Friday, August 9, 2013
New tile kits
I've been working on lots of new tile kits lately. (If you follow me on Facebook or Cardboard Warriors, you'd know that already!) Here's a peek at the Pavers Tile Kit #1 that I'm working on now, featuring an all-new pavers texture and lots of weathering options.
Check out all of the other tile kits I've released!

http://davesgames.net/catalog-metal-tile-kit-02.htm
http://davesgames.net/catalog-metal-tile-kit-03.htm
http://davesgames.net/catalog-metal-tile-kit-04.htm

Stone Tile Kits for fantasy/medieval settings:

The Pavers Tile Kit #1 should be coming soon, maybe later today.

Metal Tile Kits for sci-fi settings:
http://davesgames.net/catalog-metal-tile-kit-01.htmhttp://davesgames.net/catalog-metal-tile-kit-02.htm
http://davesgames.net/catalog-metal-tile-kit-03.htm
http://davesgames.net/catalog-metal-tile-kit-04.htm

Stone Tile Kits for fantasy/medieval settings:
Saturday, July 20, 2013

Thursday, July 11, 2013
Colony Blocks work in progress
Another one to add to my growing list of sci-fi terrain projects. The idea is really simple: one-story-tall "blocks" in a variety of dimensions (3x3, 3x4, 3x5, 3x6, 4x4, 4x5, 4x6 inches) that can be re-arranged from one game session to the next, including stacking on top of each other to create taller structures.
Here's some work in progress:
Colony Blocks 3D digital tests, showing a kind of tower block possible by stacking them up, done in SketchUp.

These are some of the 3D paper accessory bits I have to work with. Antenna modules, exhaust pipes, balconies, balcony supports, window blisters, power modules, etc.

Some of the funky details that'll be appearing on my sci-fi textures. It's good to have a big collection of these sorts of things to scatter around.

Here's some work in progress:
Colony Blocks 3D digital tests, showing a kind of tower block possible by stacking them up, done in SketchUp.
These are some of the 3D paper accessory bits I have to work with. Antenna modules, exhaust pipes, balconies, balcony supports, window blisters, power modules, etc.
Some of the funky details that'll be appearing on my sci-fi textures. It's good to have a big collection of these sorts of things to scatter around.
Thursday, June 27, 2013

40% off selected models until end of June
I'm running a sale taking 40% off some of my favorite model kits at Wargame Vault, RPGNow and DriveThruRPG. Drop by my catalog and check out the sale prices in red!
http://www.wargamevault.com/index.php?manufacturers_id=2985

http://www.wargamevault.com/index.php?manufacturers_id=2985


Monday, June 10, 2013
Security Kiosk work begins
Here's a little sci-fi model I'm working on. This'll come with a couple of different configurations. This image shows it with the 3"x3" ground piece, and there's an optional 6"x6" piece. The stick-on modules are optional. With modules on all four walls, this'll make a nice little fusion pylon or whatever.
Since this is a two-page kit, it's a good way to ease into the sci-fi collection and get more comfortable with the texturing I'll be using for a lot of sci-fi stuff later on. (Mon Calamari mercenary not included. TRAAAAP.)

Since this is a two-page kit, it's a good way to ease into the sci-fi collection and get more comfortable with the texturing I'll be using for a lot of sci-fi stuff later on. (Mon Calamari mercenary not included. TRAAAAP.)

Friday, June 7, 2013
Livestock Shelter now available
Bring on the Baby Jesus jokes, this Livestock Shelter paper model kit is now available!

Tuesday, June 4, 2013
Overflowing with Cargo Pods
Two new model kits are available... and one of them is free!

Check out the Free Cargo Pod now available through Wargame Vault, RPGNow and DriveThruRPG (this link takes you to my catalog page at DavesGames.net):
And if you like that, and want metric tons of other layer options to create countless more cargo pods, go for the retail Cargo Pods model kit (just $2.95 regular price):

Thursday, May 16, 2013
Colony Barracks test model complete
This is one I designed more than a year ago, before I took my long hiatus from modeling. The Colony Barracks is inspired by the Hadley's Hope colony from the movie Aliens (maybe you've heard of it).
The command tower is optional, so you'll get at least a couple of distinct models out of the one kit. Lots of optional gribblies too (wall/windows, antenna modules, power generators).

Monday, May 6, 2013
Low Wrecked Walls design complete
I've finished this kit, and will release it on Thursday or Friday to try to hit the weekend shopping traffic.


Sunday, May 5, 2013
Low Wrecked Walls work begins
I have a couple of projects in the works right now, and one of them is a set of low 3D wrecked walls. I'm pretty sure I'll be done with this set within the week, and if it proves to be popular then I'll start working on taller wall sets in the same 3D style, with cutouts for windows and doors (both wrecked and not-wrecked).
The Low Wrecked Walls set includes (4) 3" wall sections and (8) 6" wall sections. Texture options include stone (2 colors), bricks (5 colors), stucco and broken stucco, concrete (2 colors), optional bullet holes, burns, moss and graffiti, about 15 layers in all.


Thursday, April 11, 2013
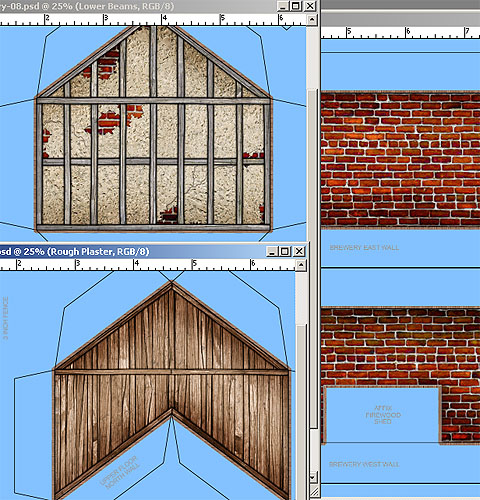
Country Brewery walls textures preview
Here are some of the wall options (not quite finished) for the Country Brewery.

Wednesday, April 10, 2013
Country Brewery roof textures preview
A peek at the roof texture options for the Country Brewery. I might adjust the colors before finalizing the PDFs, but this gives you the idea of where things are headed.

Friday, April 5, 2013
Country Brewery textures in progress
Here's how things are coming along. Looks weird without windows and doors, hey?

Tuesday, April 2, 2013
Country Brewery test model complete
I've finished my white-paper test model of the Country Brewery.
Here's the cleaned-up, polished, colorized version that I'll use when writing up the assembly instructions. I'll be able to highlight specific parts using this graphic.

And an actual photo of the test model, with a couple of 28mm-30mm scale miniatures to give you an idea of the size. You'll notice that the footprint (the ground piece) is a little different on the upper image. I decided to move the whole model back 1" from the front gate, giving a little room for a walkway in front of the fence. No big deal, but that's why I use cleaned-up graphics rather than photos: it lets me make even more revisions to the model kit.

With the test model finished, I can start working on the textures. I've been gathering a lot of new texture sources for grounds, walls, roofs, wood piles and other stuff. One of my goals this year is to create a bunch of new textures, and while I haven't exactly retired all of my old stuff, I'm trying to avoid using textures that have been used over and over.
Friday, March 29, 2013
Save 50% off Selected Paper Models
Until April 2nd, save half off some of the largest and most popular model kits and maps from Dave Graffam Models. This sale is in effect at Wargame Vault, RPGNow and DriveThruRPG.
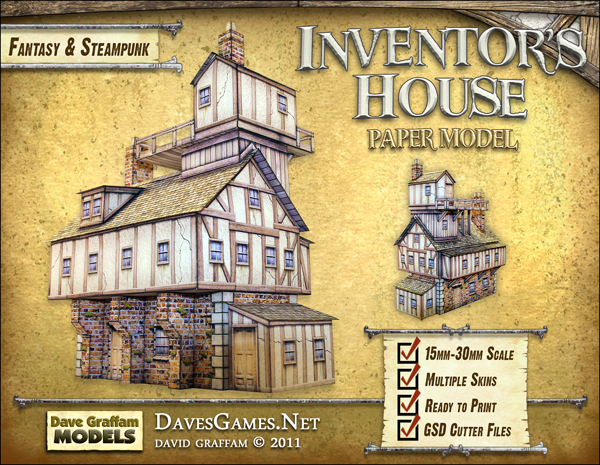
Included in this sale are the Inventor's House, Rake's Corner Map, Cobblestone Streets Map, Townhouse, Village Chapel, Watch Tower, West Gate, Willow Brook Inn, Ruined Church, Wrecked House, and Bunker Deluxe Kit.
Visit the Dave Graffam Models catalog at Wargame Vault:
http://www.wargamevault.com/index.php?manufacturers_id=2985
Saturday, March 23, 2013
Country Brewery work begins
I started working on a new model, just a few hours after publishing my last one. I'm on a roll, apparently.
The Country Brewery is one that I've had in the back of my mind for a while, and folks have mentioned their interest in something like this ever since I hinted that I might design one.
Right now I'm still working out the geometry, and I do everything in 2D to start with, so even I won't know what it really looks like until I assemble my first test model. But it's looking good so far. I'm going to include some fun 3D details to make it really interesting and quirky, which is something that has worked for me before with big models like the West Gate and the Inventor's House.
My inspiration for this model comes partly from the Greenberry Tavern in Corvallis, Oregon. It's a watering hole a couple of miles up the road from where I live. It has a funky shape and a certain vibe that always draws my eye when I pass it (I've only stopped in twice, not much of a drinker...). I may ask the owners if I can take some photos of the red-painted walls and some other features and incorporate those into the Country Brewery.
Anyway, nothing to show yet, but I'll post pictures of my progress, as it happens!
Friday, March 22, 2013

Thursday, March 21, 2013
Wednesday, March 20, 2013

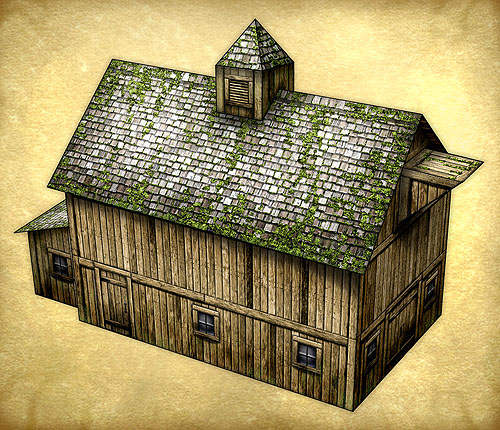
Frontier Barn update #1
The roof moss took forever! Well, it seemed like it, anyway. But to get believable looking moss, you have to get in between the shingles, and that takes a lot of patience.
The trick I'm using here is one I use a lot. I start with a bright color, in this case pink. I create a new layer, and paint (in pink) all of the areas where I want the moss to go.
Then I get a full page of a prepared texture, which happens to be a layer of grass that I've altered a bit. I lay the prepared texture field over my layer of pink markings. I use the Magic Wand to select "around" the pink markings, then hide that layer (or put it in my "NOT USED" folder of layers). Then I select the layer of grass, and simply Delete the unwanted areas. What I'm left with is "moss" only in the areas where I want it. To give the moss some depth and life, I use Layer Styles: Drop Shadow (or Outer Glow, making sure to set the layer type to Normal instead of Screen), and also some Bevel/Emboss.
I'm pretty sparing when it comes to Layer Styles, since any Photoshop user can detect them when they're used -- or abused.
Looking at the roof of the cottage next door, I can see that I could actually put more moss on the roof of the barn, so I'm going to go back and be more generous with it.
Then, ground textures. I've photographed a bunch of new grounds here in my new place (I rent a cabin on a farm in Oregon) and I'm eager to try them out.
Tuesday, March 19, 2013
Frontier Barn work in progress
The Frontier Barn is my next paper model project. There's a jutting hayloft hatch on the north wall, a room extension on the south wall, and a cupola. I got the idea for this barn from a couple that I'd seen here in Oregon, my new home. It's a composite of two particular barns, both around the little town of Bellfountain. Yeah, I'd never heard of it either.
Here's a peek at the texture work in progress.

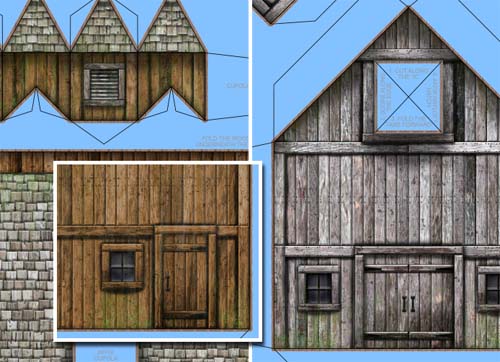
The next step is to hit the whole thing with some Dodge and Burn in Photoshop, which will give some nice shading effects. I also need to work on the ground textures, some moss for the rooftops (I'm going to try to make the moss as realistic as possible, using an all-new technique) and snow layers. That should let this work as a companion model to the Frontier House and Frontier House Winter Edition. Color options will be the two shades you see here, rough gray and brown. Door and window positions will be on their own layers so you can customize those access points. It doesn't really look like it, but there will be a lot of layers on these PDFs...
At the rate things are going, this set will be available by Friday.
Subscribe to:
Posts (Atom)